Manage roles
This guide covers the management of roles within the EasyInk platform. Roles define a named set of permissions that can be assigned to individual users. Each role controls what administrative actions a user can perform, such as managing organizations, users, templates, settings, and more. Roles are accessed through the Security section of the left navigation menu.
Prerequisites
- An active EasyInk administrator account with the Manage roles permission.
- Access to the EasyInk platform with valid credentials.
Step-by-Step Instructions
Viewing Roles
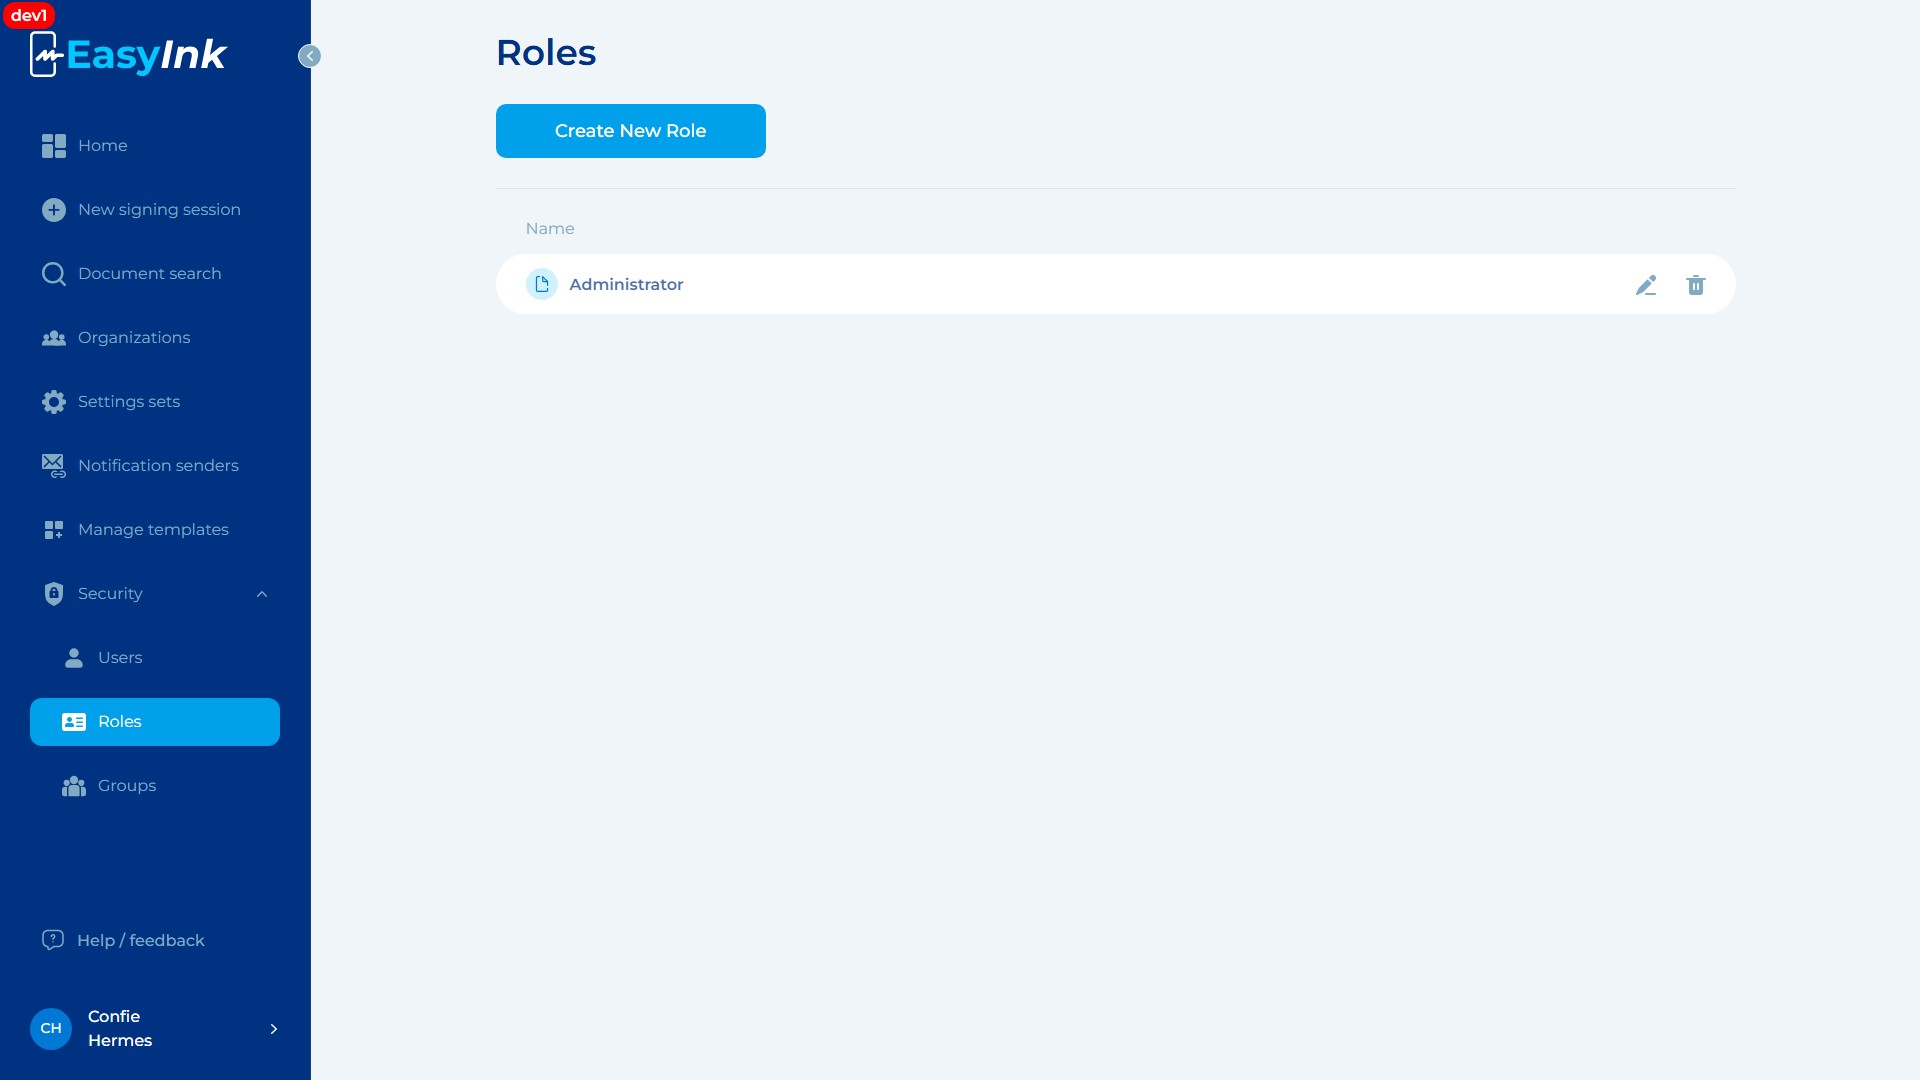
- Navigate to the Roles page: In the left navigation menu, expand the Security section by clicking on it, then click Roles. The system displays the Roles list page with a Create New Role button at the top and a table showing all defined roles. Each row displays the role Name along with Edit (pencil icon) and Delete (trash icon) action buttons on the right side.
Creating a New Role
-
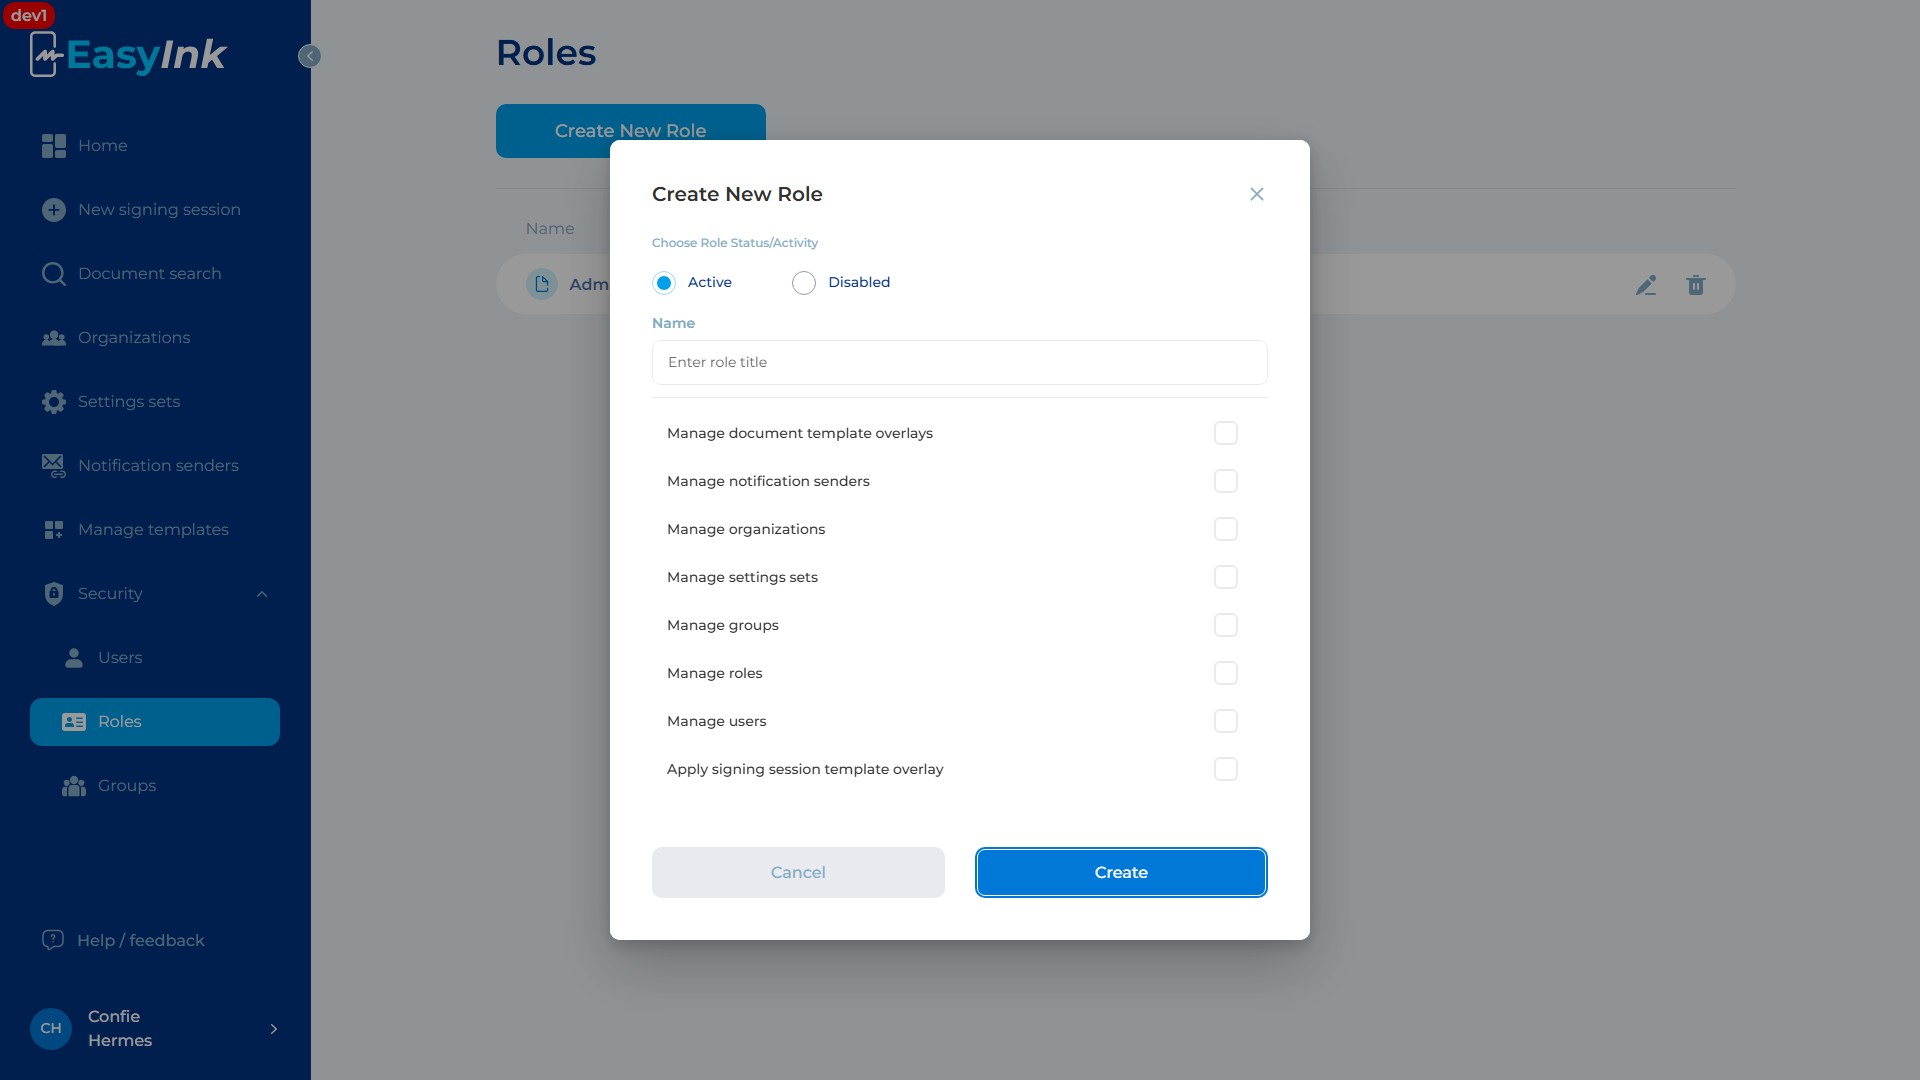
Click Create New Role: Click the Create New Role button at the top of the page. The system opens the Create New Role modal dialog.
-
Set the role status: In the Choose Role Status/Activity section at the top of the dialog, select either Active or Disabled. Active roles can be assigned to users immediately; disabled roles are saved but not available for assignment.
-
Enter the role name: Type a descriptive name for the role in the Name field (placeholder text: "Enter role title").
-
Select permissions: Check the appropriate permission checkboxes to define what actions users with this role can perform. Available permissions include:
- Manage document template overlays — create and edit document template overlays
- Manage notification senders — create, edit, and delete notification senders
- Manage organizations — create, edit, and delete organizations
- Manage settings sets — create, edit, and delete settings sets
- Manage groups — create, edit, and delete permission groups
- Manage roles — create, edit, and delete roles
- Manage users — create, edit, deactivate, and delete user accounts
- Apply signing session template overlay — apply template overlays to signing sessions
- Additional permissions are available by scrolling down in the dialog
-
Create the role: Click the Create button to save the new role. The role appears in the list. Click Cancel to discard and close the dialog without creating the role.
Editing a Role
- Edit an existing role: Click the Edit button (pencil icon) on the right side of the role row. The system opens the role editing dialog where you can modify the name, status (Active/Disabled), and permission checkboxes. Save your changes when done.
Deleting a Role
- Delete a role: Click the Delete button (trash icon) on the right side of the role row. The system displays a confirmation dialog. Confirm the deletion to permanently remove the role. Note: deleting a role that is currently assigned to users will remove those permissions from the affected users.
Summary
The Roles management page provides an interface for defining and managing permission sets in EasyInk. Each role has a name, an Active/Disabled status, and a set of granular permissions that control access to organizations, users, settings, templates, notification senders, groups, and other administrative features. Administrators can create new roles with specific permission combinations, edit existing roles to adjust access levels, and delete roles that are no longer needed.